Firetight WSW
Opslag- en installatie instructies
Het installeren van de FIRETIGHT WSW kan eenvoudig en snel. De FIRETIGHT WSW zet zichzelf klem tussen de dakelementen na het lossnijden van de folie.
Er zijn geen extra bevestigingsmiddelen, kit of schuim nodig.
Volg onderstaande stappen voor een correcte opslag en installatie.
Storage and installation instructions
Installing the FIRETIGHT WSW is quick and easy. The FIRETIGHT WSW secures itself between the roof elements after the foil is cut loose. No additional fasteners, sealants, or foam are required.
Follow the steps below for correct storage and installation.
Storage instructions / Opslag instructies
(NL) Opslag instructies
- Sla de FIRETIGHT WSW vlak en droog.
- Vermijd direct zonlicht en extreme temperaturen.
Storage instructions FIRETIGHT FUSE (EN)
- Store dry and flat.
- Avoid direct sunlight and extreme temperatures during storage

Installatie instructies /Installation instructions
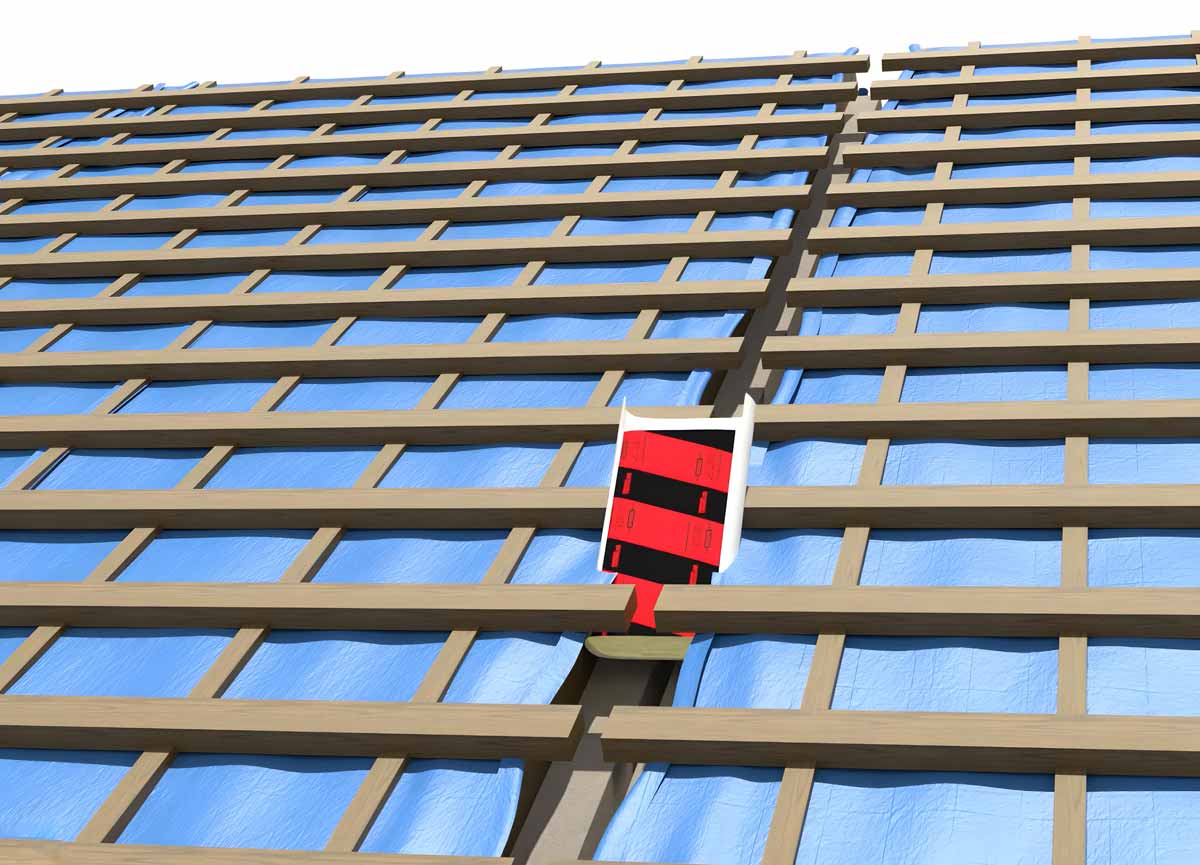
(NL) STAP 1: Plaats de eerste FIRETIGHT WSW
- Begin onderaan het dak en schuif de WSW tussen de panlatten in de ruimte tussen de dakelementen, waarbij de zijde met de uitstekende folie naar boven wijst.
(EN) STEP 1: Placement of first FIRETIGHT WSW
- Start at the bottom of the roof and slide the WSW between the roof battens into the space between the roof elements, ensuring the side with the protruding foil faces upwards.
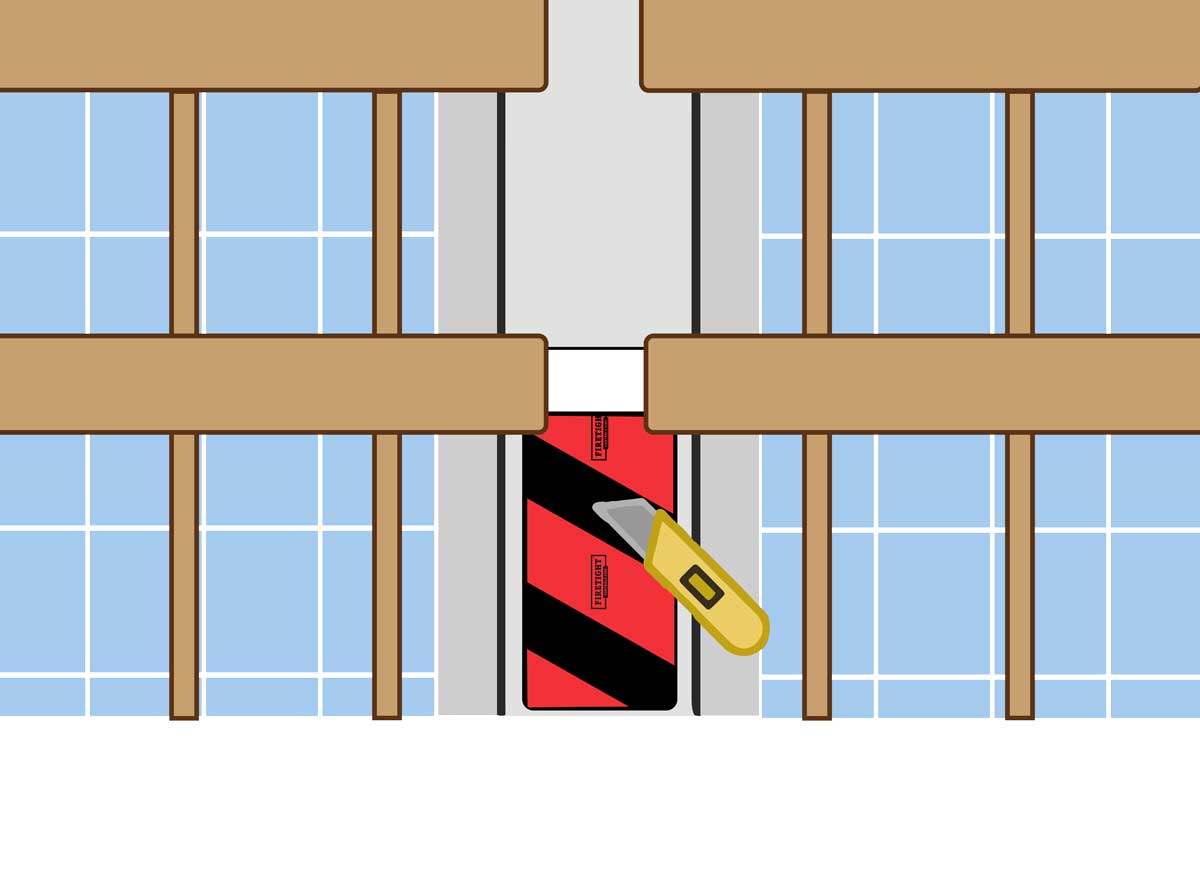
(NL) STAP 2: Activeren van de WSW
- Snijd de folie in het midden langs de lengterichting door met behulp van een stanley-mes. De WSW zet zich direct uit en klemt stevig tegen de zijkanten van de dakelementen, waardoor een brandwerende en luchtdichte afdichting ontstaat.
(EN) STEP 2: Activate the WSW
- Cut the foil down the middle along its length using a utility knife. The WSW will immediately expand and press firmly against the sides of the roof elements, creating a fire-resistant and airtight seal.
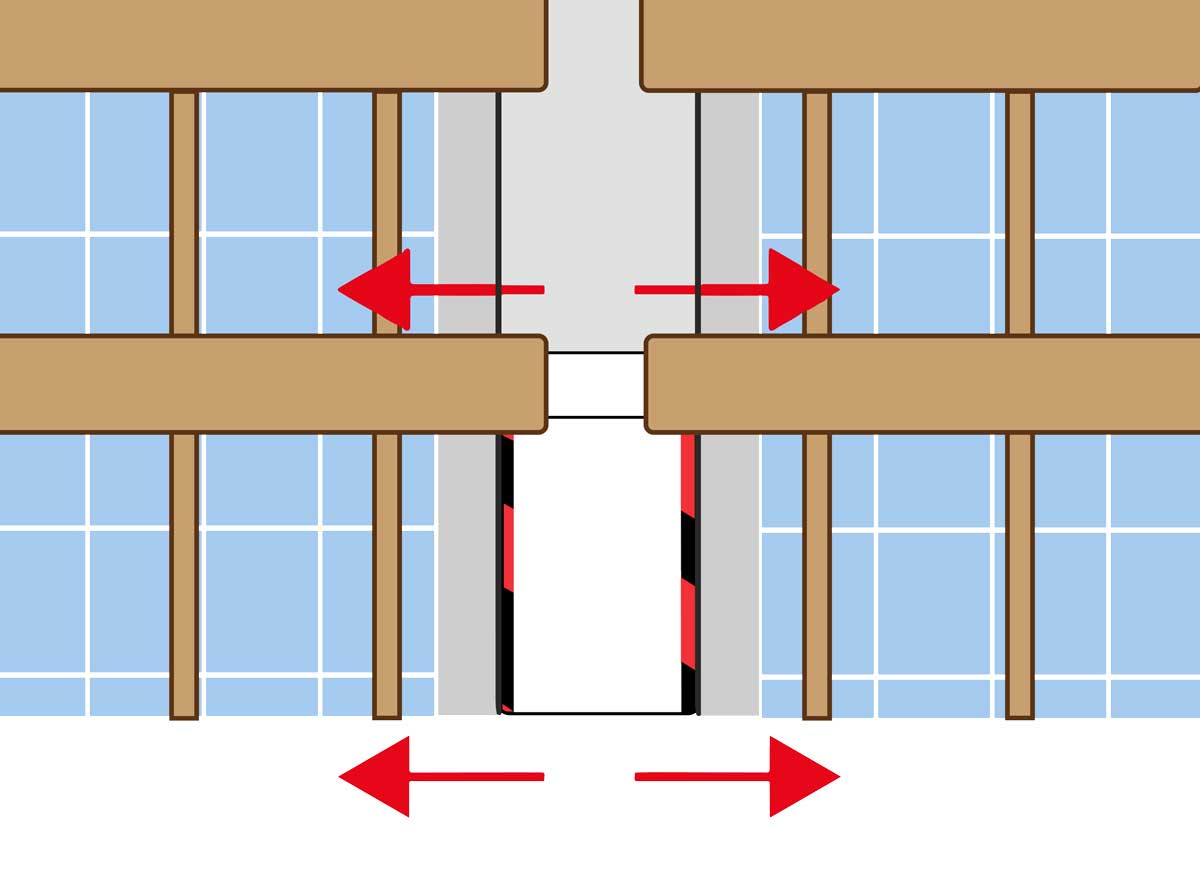
(NL) STAP 3: Aansluiting volgende WSW-blokken
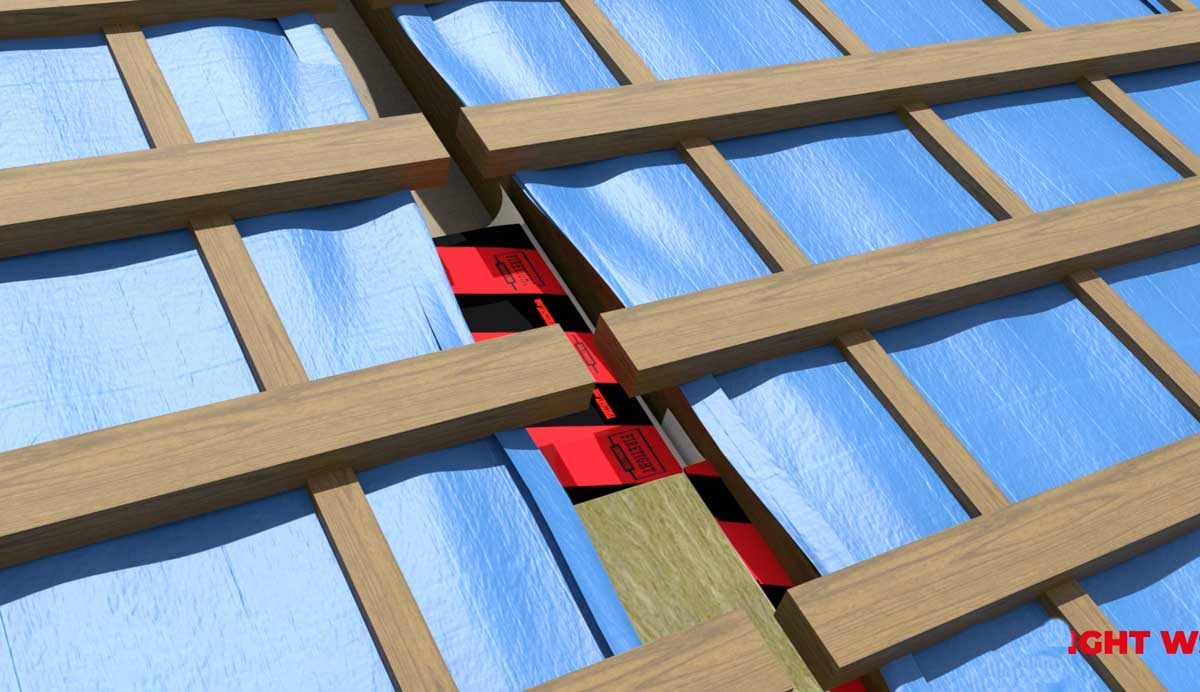
- De geactiveerde WSW heeft aan één kopse zijde een uitstekende folie, leg hier de volgende WSW op en schuif deze stevig tegen het eerste blok aan.
- Activeer ook deze WSW (stap 2) en herhaal deze stappen totdat de nok bereikt is.
(EN) STEP 3: Connection of the next WSW-blocks
- Slide the next WSW block over the protruding foil and slide it firmly against the first block.
- Activate this block as well (step 2) and repeat all the steps until the ridge is reached.
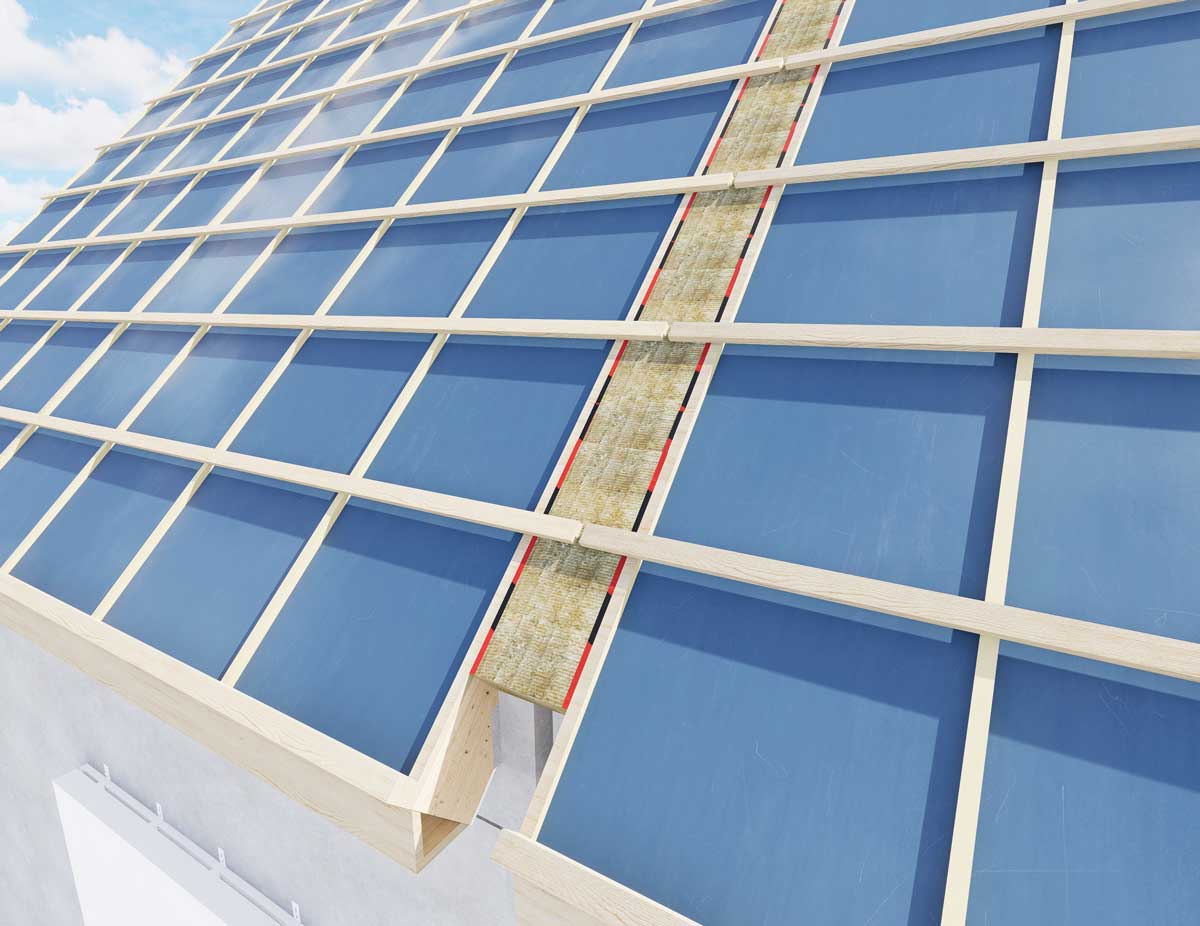
(NL) STAP 4: Nokaansluiting
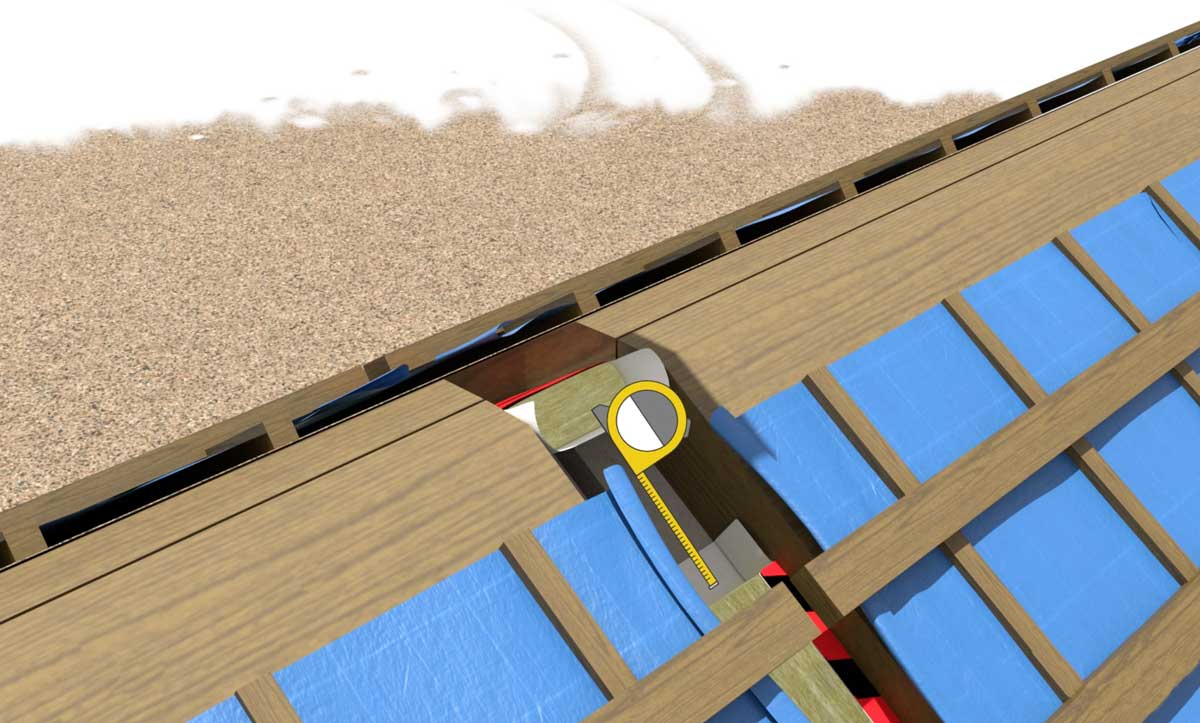
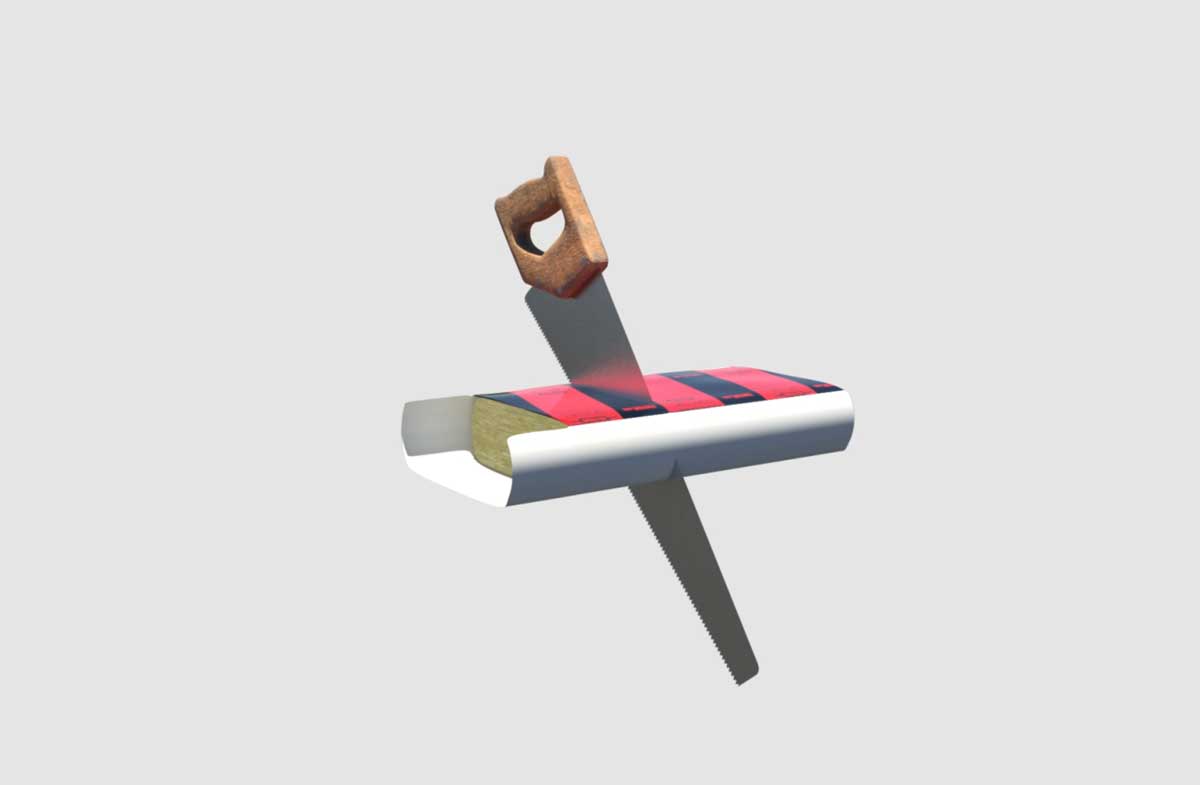
- Snij het laatste blok eventueel op maat met een isolatiemes.
- Zorg dat de laatste twee blokken bij de nok elkaar overlappen.
(EN) STEP 3: Ridge connection
- If necessary, cut the final block to size using an insulation knife.
- Ensure that the last two blocks at the ridge overlap each other.
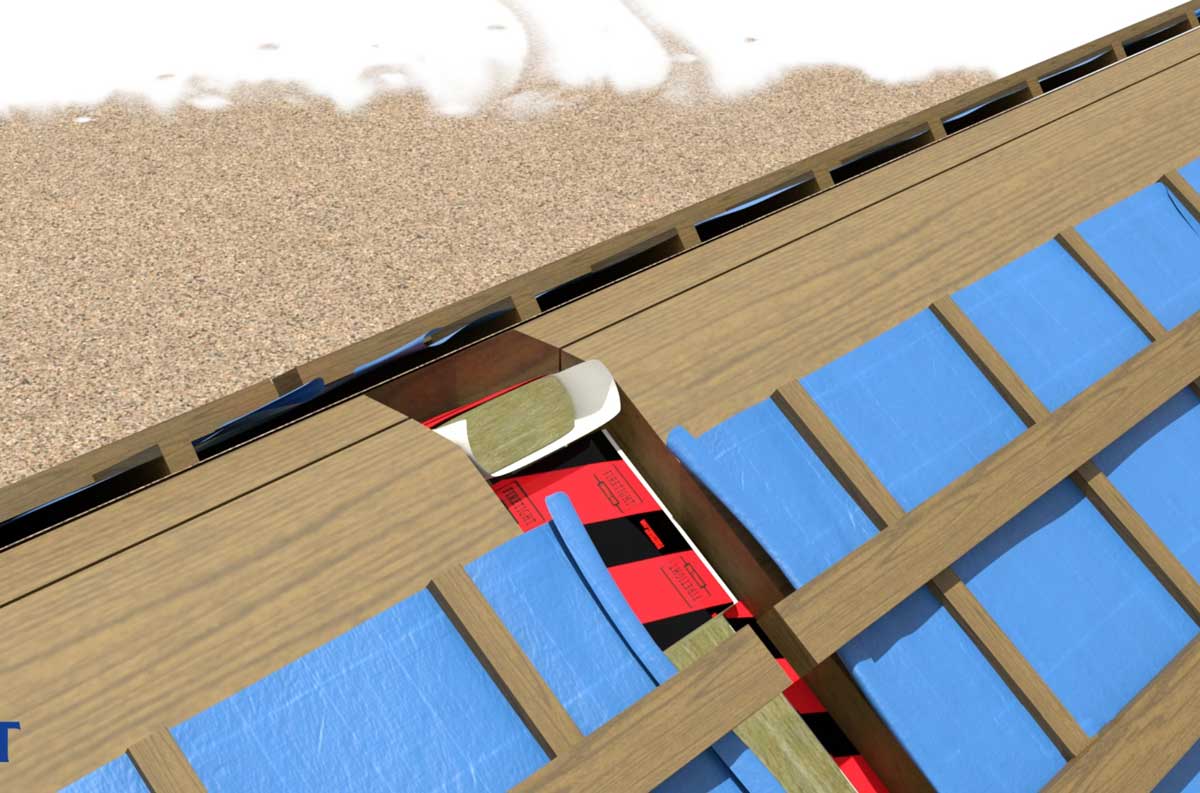
(NL) STAP 4: Dakfolie terugslaan
- Indien mogelijk, sla de dakfolie terug over de blokken.
- vouw deze samen en niet deze vast voor een betere weersbestendigheid.
(EN) STEP 3: Shut roofing foil
- If possible, fold the roof foil back over the blocks.
- Fold the roofing foil together and staple it together for better weather resistance.
CONTACT US FOR MORE INFO
Installing FIRETIGHT® is easy, but some situations ask for extra attention.
E-mail us or call us (during Dutch Business hours).
S-GRAVELANDSEWEG 246
3125 BK SCHIEDAM THE NETHERLANDS
+31(0)10 – 30 20 200
INFO@FIRETIGHT.COM
3125 BK SCHIEDAM THE NETHERLANDS
+31(0)10 – 30 20 200
INFO@FIRETIGHT.COM
POSTBUS 146
3100 AC SCHIEDAM
THE NETHERLAND
3100 AC SCHIEDAM
THE NETHERLAND
© ALERT INSULATION 2018, All right reserved

